-
웹개발자의 iOS 개발기(11) - [UIKit] 네비게이션, 탭바iOS 2025. 1. 27. 17:48
01. NavigationController 알아보기
일반적인 Navigation 만들기
- 아래 Navigation Controller를 클릭하면 연결된 Navigation Contrller 화면 하나가 생긴다.
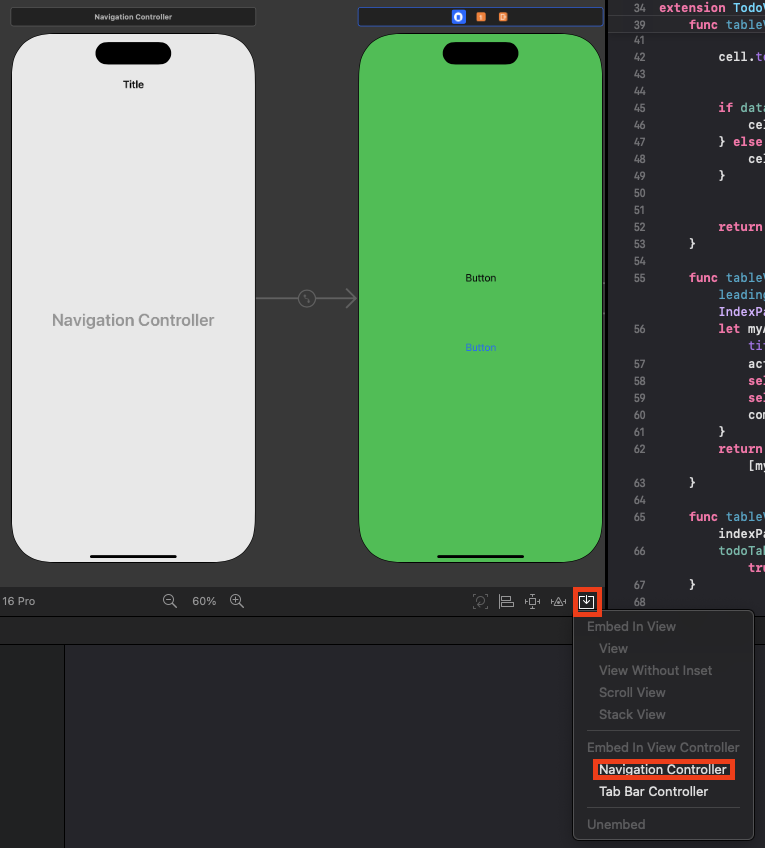
Navigation Controller 생성 - 이동후 보여줄 ViewController 하나 더 생성
- Button 우클릭 드래그 해서 3번째 ViewController에 드랍
- Show 선택
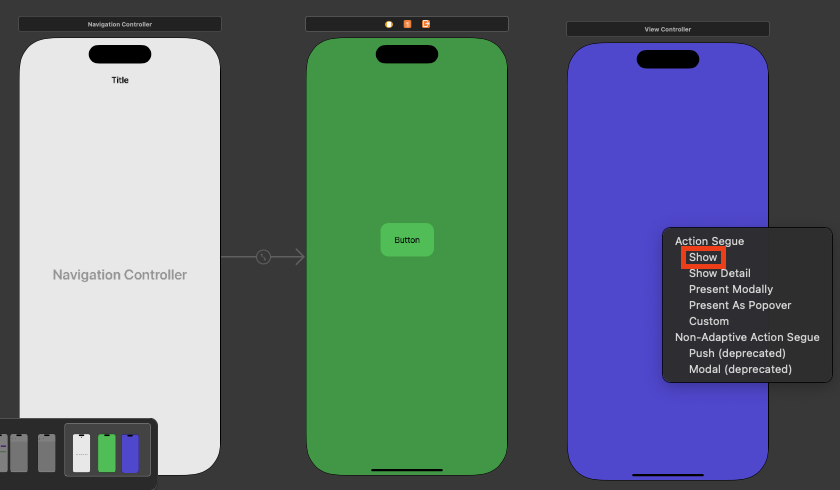
화면 연결 - 결과

Show Navigation 결과 모달 형태 Navigation 만들기
- ViewController 2개 생성
- 버튼 우클릭 드래그앤드랍, Show 선택
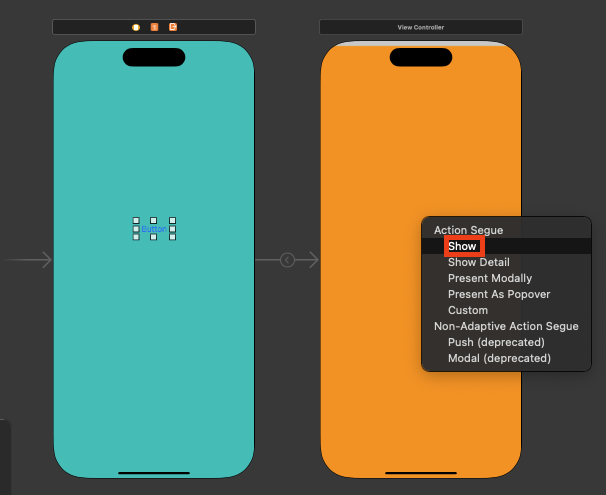
화면 연결 - 결과

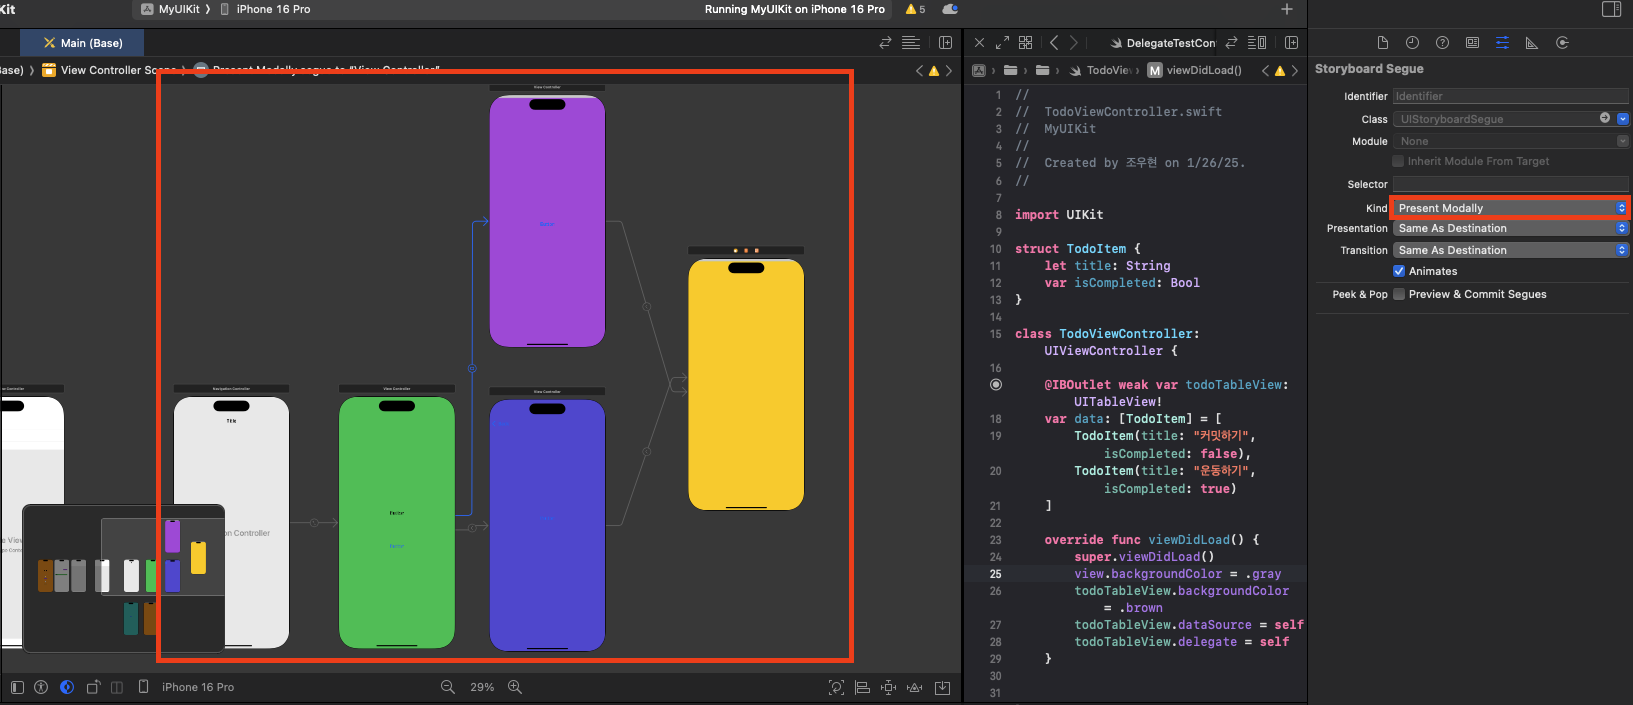
Modal Navigation 결과 여러 화면 이동하기
보라색 화면으로 이동하는 화살표 선택 후 Present Modally 선택
초록 → 보라 → 노랑 이동할 때 모두 모달로 이동한다.
반면 초록 → 인디고 → 노랑 이동할 때는 모두 show로 이동한다.
여러 화면 Navigation - 결과

결과 네비게이션은 show이든 modal이든 화면이 스택처럼 쌓이는 구조이다.
(화면 이동하면 이전 화면이 없어지는 게 아니라 그 위에 쌓이는 것)
이 점을 유의해서 만들어야겠다.
TabBarController 알아보기
- 아래 Tab Bar Controller를 클릭하면 연결된 Tab Bar Contrller 화면 하나가 생긴다.
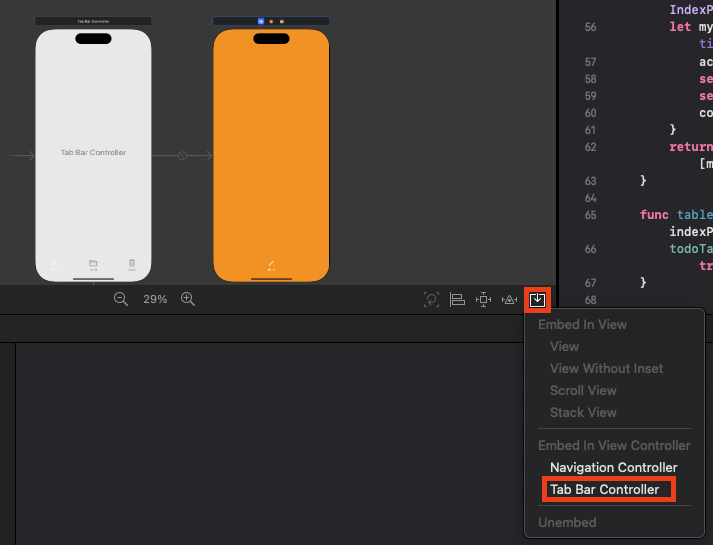
Tab Bar Controller 생성 - 이미지 설정
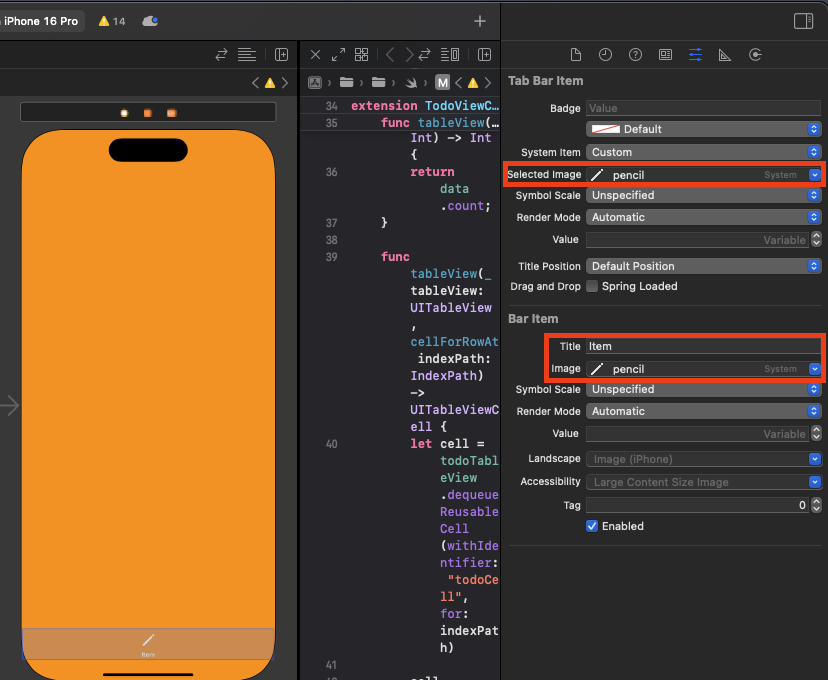
이미지 설정 - 다양한 화면 연결

TabBar 구조 - 결과

TabBar 결과 03. segue로 데이터 전달하기
segue
- ViewController 간 데이터 전달 방법
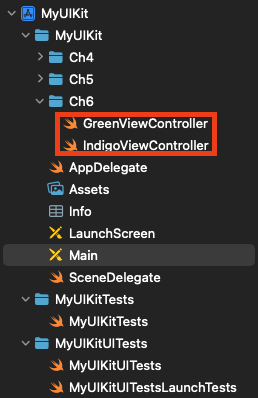
- ViewController 생성
ViewController 생성 - View와 연결
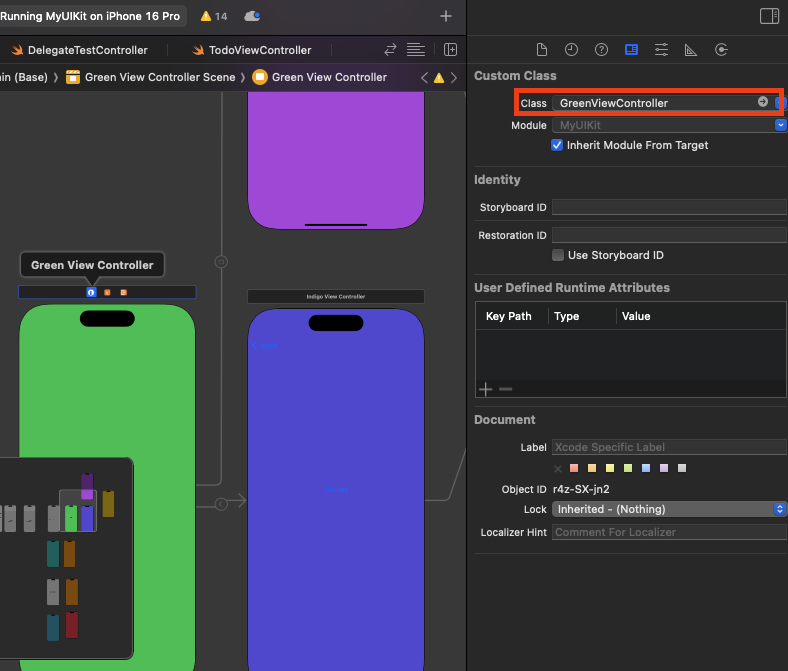
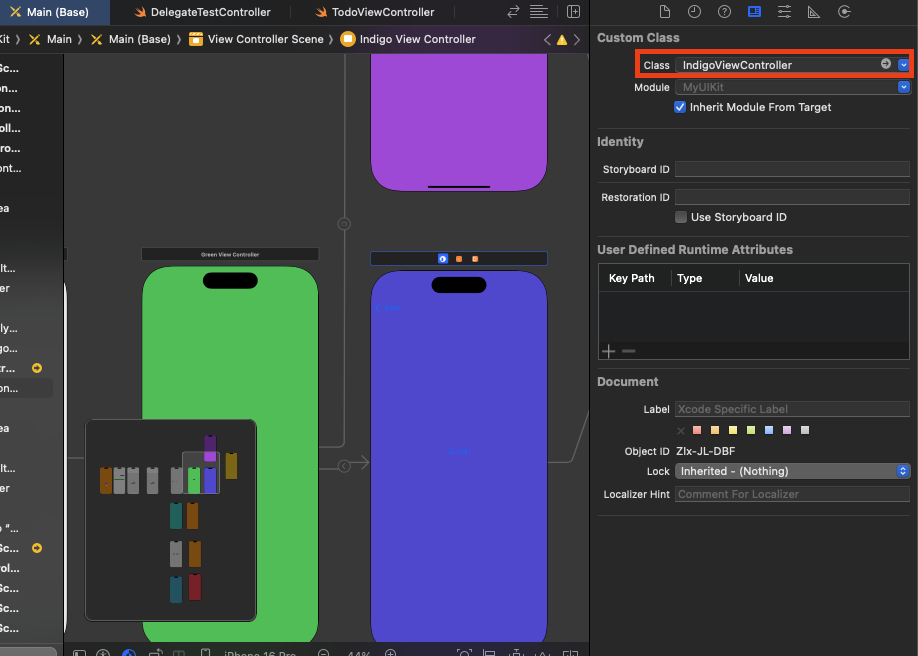
View와 ViewController 연결 - segue 생성
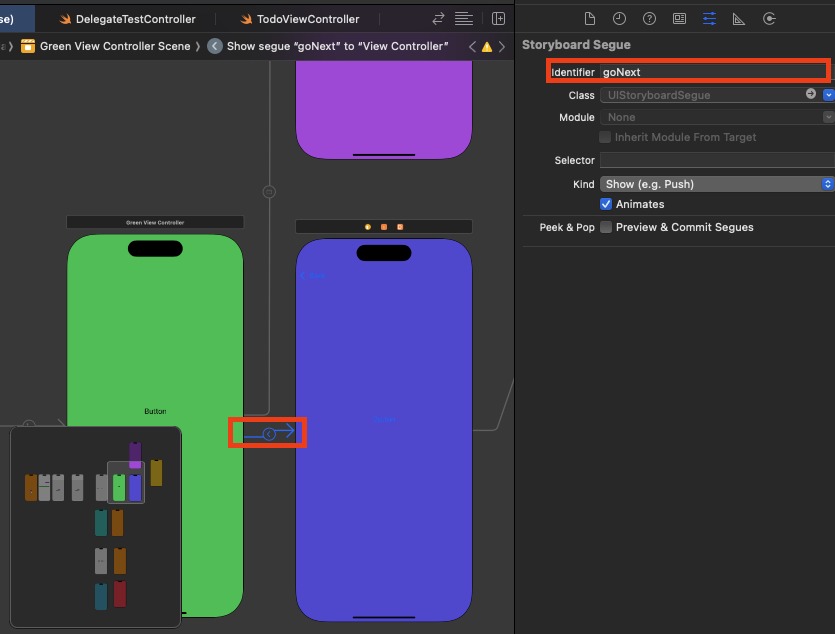
segue생성 - GreenView에 TextFiled 생성, IndigoView에 Label 생성
- 우클릭 드래그 해서 각각의 ViewController에 드랍, outlet 생성
GreenViewController.swift
import UIKit

class GreenViewController: UIViewController {

    @IBOutlet weak var insertNameTextField: UITextField!

    override func viewDidLoad() {
        super.viewDidLoad()

    }

    // prepare: segue가 이동하기 직전에 실행
    override func prepare(for segue: UIStoryboardSegue, sender: Any?) {
        if segue.identifier == "goNext" {
            let viewController = segue.destination as! IndigoViewController
            viewController.inputName = insertNameTextField.text!
        }
    }

}
IndigoViewController.swift
import UIKit class IndigoViewController: UIViewController { @IBOutlet weak var name: UILabel! var inputName: String = "" override func viewDidLoad() { super.viewDidLoad() // name에 바로 넣는게 아닌 inputName 이라는 변수를 만들어서 넣는다. // name에 바로 넣으면 화면이 모두 그려지기도 전에 넣으려고 시도해서 터진다. name.text = inputName } }- 결과
화면 간 데이터 전달 04. NavigationController가 있는 앱 만들기
ProfileViewController.swift
import UIKit

class ProfileViewController: UIViewController {

    @IBOutlet weak var profileTableView: UITableView!
    var profileData = ["아이디변경", "이메일", "전화번호"]

    override func viewDidLoad() {
        super.viewDidLoad()
        profileTableView.dataSource = self
        profileTableView.delegate = self

    }

    override func prepare(for segue: UIStoryboardSegue, sender: Any?) {
        if segue.identifier == "profileSegue" {
            let vc = segue.destination as! ProfileDetailViewController
            vc.inputText = profileData[0]
        }
    }
}

extension ProfileViewController: UITableViewDelegate, UITableViewDataSource {

    func tableView(_ tableView: UITableView, numberOfRowsInSection section: Int) -> Int {
        return profileData.count
    }

    func tableView(_ tableView: UITableView, cellForRowAt indexPath: IndexPath) -> UITableViewCell {

        let cell = profileTableView.dequeueReusableCell(withIdentifier: "profileCell", for: indexPath)

        cell.textLabel?.text = profileData[indexPath.row]

        return cell

    }


}
ProfileDetailViewController.swift
import UIKit class ProfileDetailViewController: UIViewController { @IBOutlet weak var textLabel: UILabel! var inputText: String = "" override func viewDidLoad() { super.viewDidLoad() textLabel.text = inputText // Do any additional setup after loading the view. } }- 결과
결과 'iOS' 카테고리의 다른 글
웹개발자의 iOS 개발기(12) - [SwiftUI] 네이버 음성메모앱 클론코딩 (0) 2025.05.06 웹개발자의 iOS 개발기(10) - [UIKit] 테이블뷰, TableView (0) 2025.01.26 웹개발자의 iOS 개발기(9) - [UIKit] AutoLayout (0) 2025.01.26 웹개발자의 iOS 개발기(8) - [UIKit] UIKit 입문 (0) 2025.01.26 웹개발자의 iOS 개발기(7) - [SwiftUI] 모달, 네비게이션, 탭뷰 (5) 2025.01.26